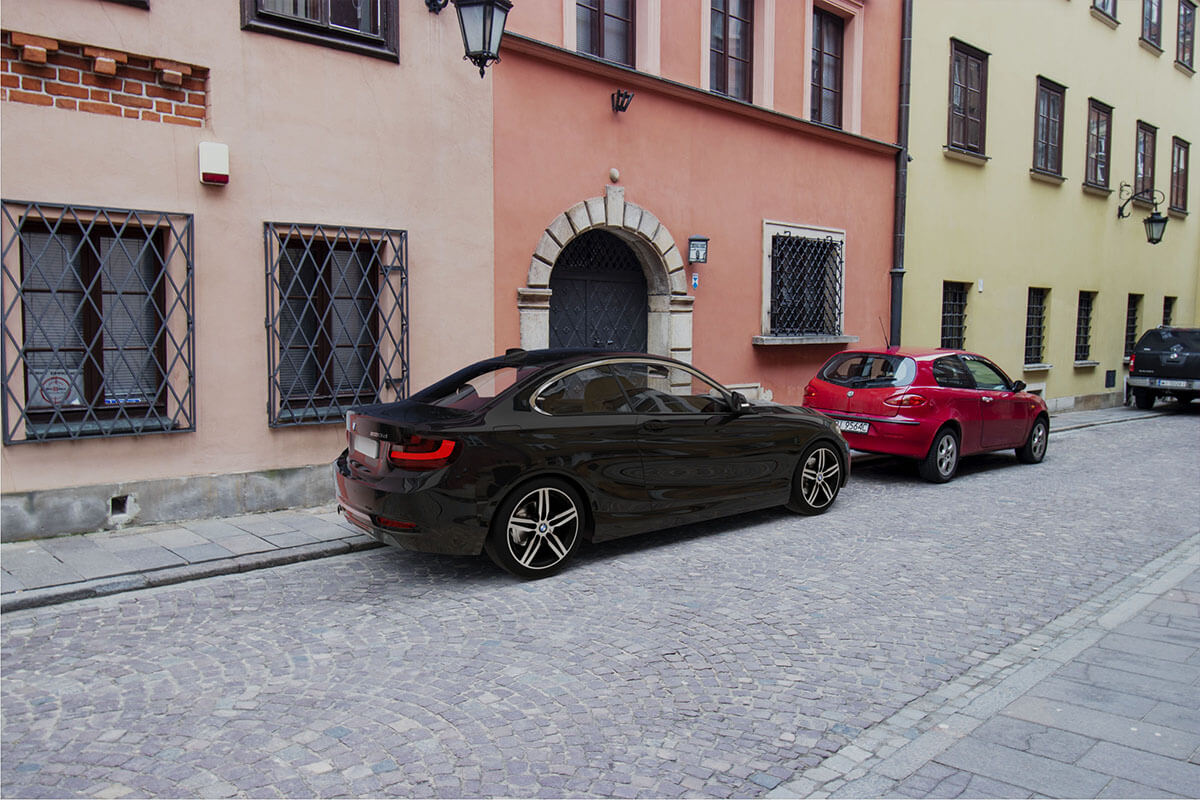
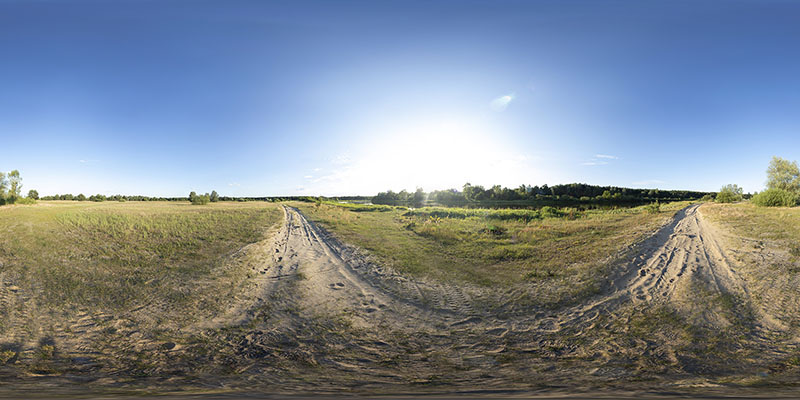
Adding a basic HDRI setup to a scene in Blender is surprisingly easy and requires only a few steps. First download .hdr panorama, JPG panorama and one of background photos of Old Town Street HDRI.
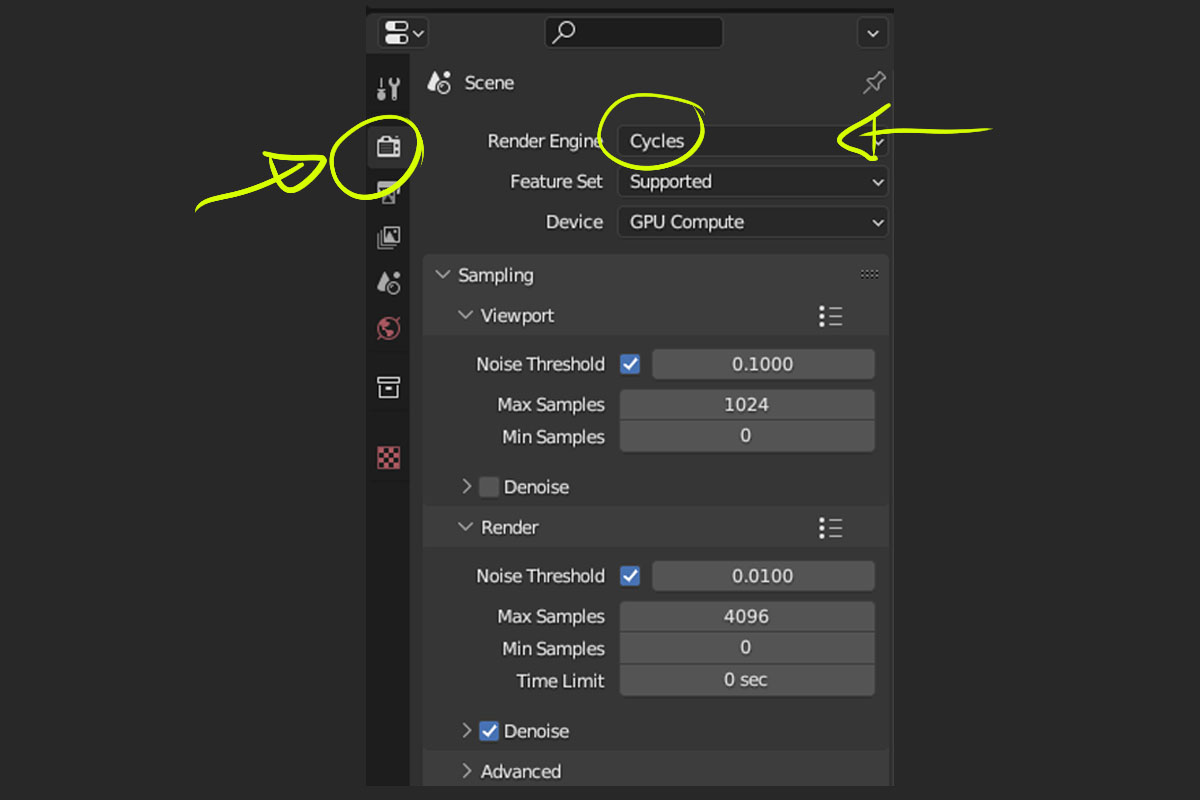
1) Start by creating a new project and setting the rendering engine to Cycles. For now unclipped HDRI do not work with Eevee.
2) Click on the "Shading tab" at the top of the screen and switch to "World" mode.

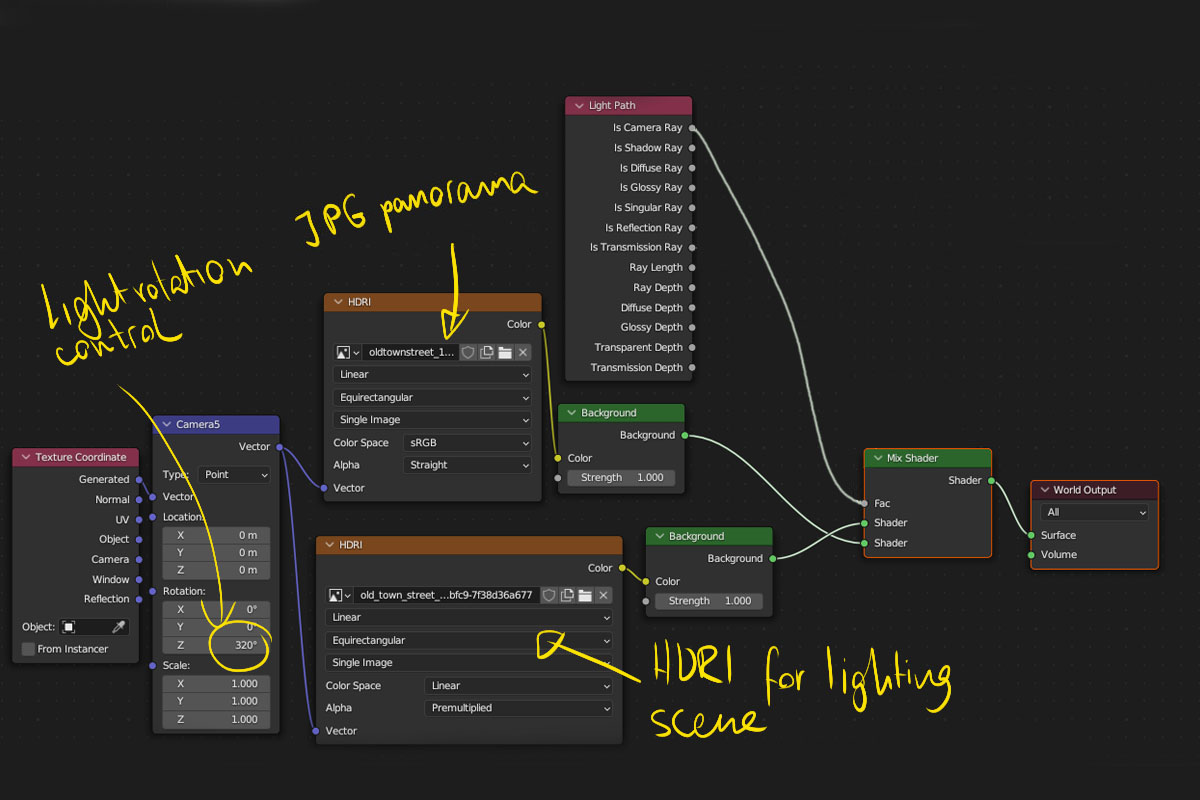
3) Set the nodes as shown in the following screenshot. The "Ray Path" node will force the program to use .hdr file to light the scene while using the color corrected .jpg file for crisp background (if you decide not to use camera background photo).
4) Now we need to add the model and shadow catcher. To do this we add a plane and then in the menu "Object properities" -> "Visibility" we check the "Shadow catcher" option and in the "Ray visibility" tab we leave only the camera. This will prevent our shadowcatcher to be visible in reflections. More advanced option is to texture shadowcatcher but it is a little to complicated for this post.

6) Choose one normal photo from HDRI location (not panorama), add it as a camera background and set opacity to 1. Then switch to the render preview and set the model and camera settings to match the perspective of the photo. In the World settings in the Mapping node, rotate on z-axis so that the position of the sun on HDRI matches the photo.


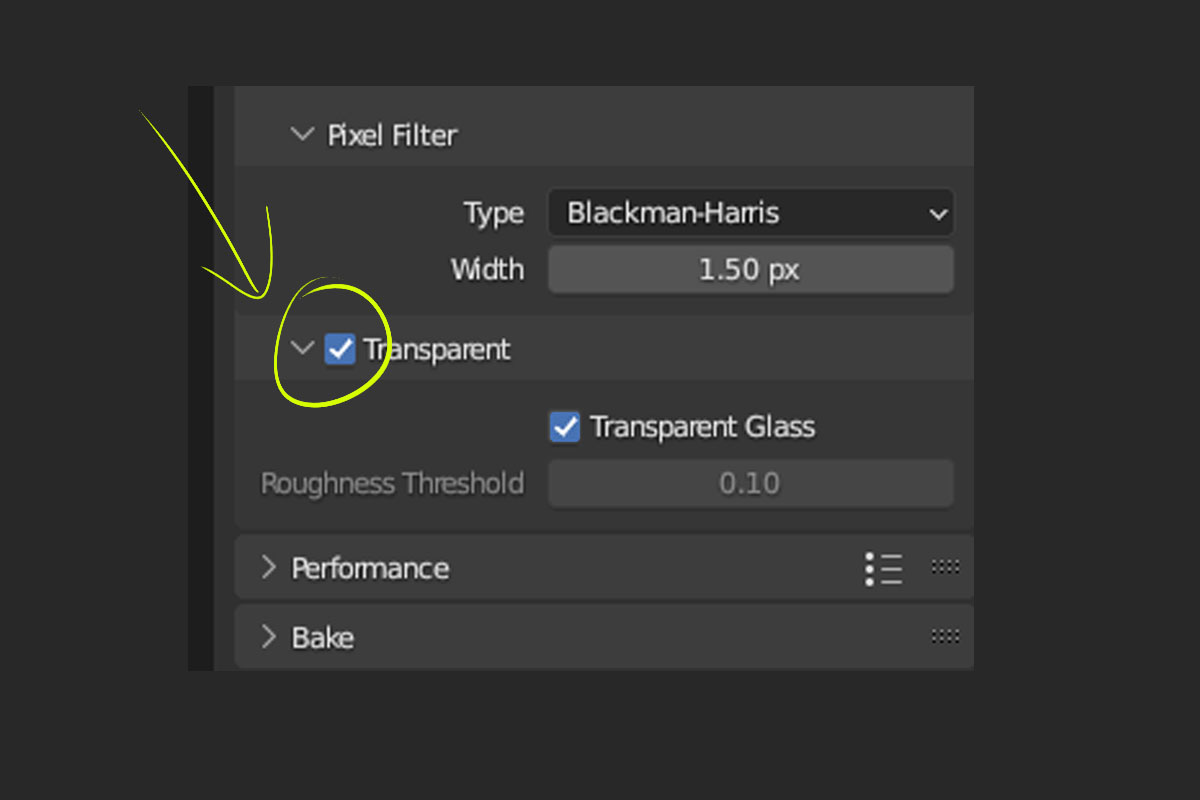
7) In the "Rendering" -> "Film" tab we check the transparent option, which makes the background (in our case HDRI and camera photo not be visible in the render).
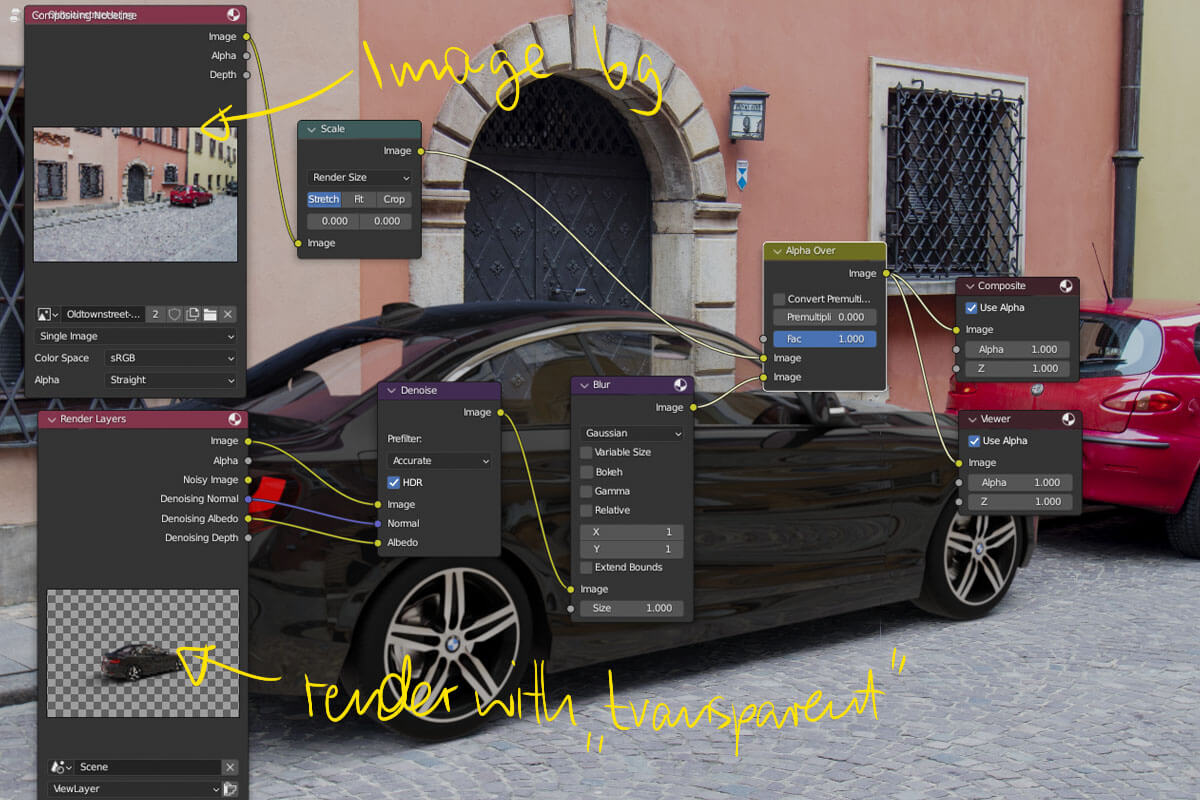
8) Next, go to the Compositing tab and check the "use nodes" option. Set the nodes as shown in the following screenshot and reder the scene. A more advanced process may also consider modeling and texturing the shadow catcher to reflect in the objects, rendering the shadows on a separate render layer or post production and compositing in another program (e.g. Photoshop, Nuke, etc.). You can also use photos only as a horizon - then a jpg photosphere will suffice as a background.
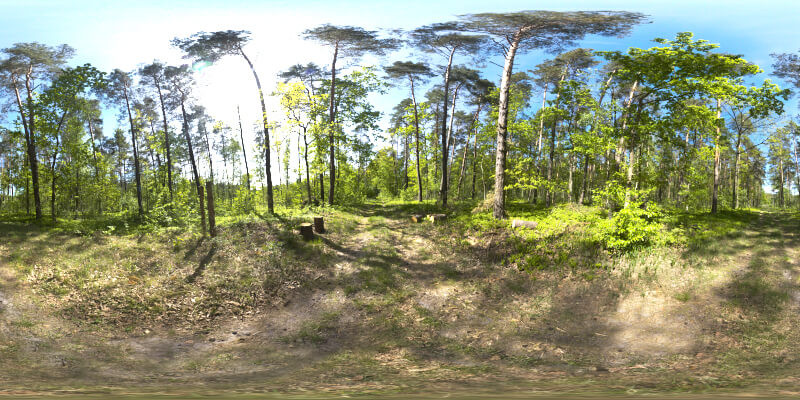
Other FREE HDRI


Frequently Asked Questions
Contact me